The story of the music van
I finished my master’s thesis in music therapy at the University of Bergen in the spring of 2020 as the Covid-19 pandemic spreads and borders close. Encouraged by stories of others music therapists who created music therapy roles from within, I began my career as a milieu therapist in a staffed housing unit for people within the field of mental health and substance abuse. The team includes professionals from various backgrounds, including psychology, pedagogy, nursing, social work—and now, a music therapist. This facility was the freshest addition to the existing 7-8 housing units in the municipality. It was a newly built, modern structure, with a clear plan for every square meter. But as I would notice, a music room was not a part of the intended design. I started to think about how to handle the options I had in the situation.
People gradually started to move in, and I discovered that several had an interest in music. One invited me to jam in his apartment, using his own instruments since I didn’t have any yet. It felt meaningful to connect through music, especially in a setting where we try to build a relation amid a sea of restrictions (both due to Covid-19 and two-on-one staffing), power dynamics, unregulated work space, being in his new home.
A major challenge for me was the lack of a dedicated space, equipment, and transportation to offer music therapy. Building a music room in every residence would be resource-intensive, and many patients need services where they live, as they cannot travel to centralized locations. This led me to consider how music therapy could function as a decentralized service. Word spread that our service area had a music therapist, and I began receiving inquiries from other residences, where staff reported that several patients were interested in music. I realized I needed to broaden my perspective. Musical home visits seemed to be a recurring need.
However, there are several challenges: patients in municipal supported housing rent their apartments and may not have musical instruments, meaning I would need to provide them. Not everyone is comfortable with home visits or inviting someone into their private space. Home visits also carry risks, as they are unregulated work environments. Common areas could be an alternative, but they’re not always available, and some may find it disruptive to play music around others.
To make this work, I need access to musical instruments, a suitable room—preferably one where we won’t be disturbed and can work in peace—access to electricity, and a means of transportation to travel between locations.
When I set out to create a new music therapy service, I quickly realized that two things had to happen at the same time: I needed both funding and dedicated time to work on it. One without the other wouldn’t get me anywhere. So, I focused first on securing time to apply for grants and develop the project.
I started writing applications, thinking that if I could bring in external funding, the municipality would be more likely to support the idea, especially since it wouldn’t cost them anything. But I soon learned that applying for funding isn’t a straightforward process. My first application in spring 2021 was ambitious but vague. I didn’t have a concrete plan yet, just an idea. It was rejected, but the feedback was helpful: I needed a clearer target group, a project team, and a more detailed plan. I had been thinking too small—just about my own workplace.
I revised and submitted a second application, which also got rejected. Still, the feedback was more positive. They liked the concept and user involvement, but said the project structure and methods were underdeveloped. I kept going. By spring 2022, I submitted a third application. Rejected again but this time, the feedback focused on long-term impact and logistics. Would music therapy actually reduce the need for municipal health services? How would I manage travel and visits? Cost effectiveness and logistics.
After three rejections, I started to doubt whether this would ever work. But I had a permanent job as an milieu therapist, so I wasn’t really in a rush. Still, I wanted to use my skills as a music therapist. The municipality had never hired one before, there was no job code, no job description, and no clear understanding of what I could offer. I had to explain time and time again why they needed a music therapist when other staff also played instruments. What made my role different?
After my third rejected grant application, I had a serious conversation with my department head. I needed to know if the service area was genuinely interested in using my skills as a music therapist. If not, I was ready to look elsewhere, somewhere that was willing to invest in music therapy. Since music therapy didn’t yet exist in our municipality, we agreed that I would be given dedicated time in the fall of 2022 to work on creating my own position and securing project funding. Up until then, I had been writing applications on top of a full-time job. I was still motivated, but now I felt more pressure. I wanted to prove that their investment in me was worth it.
Once the latest application was submitted, the outcome was out of my hands. It was up to the review board to decide whether my project had a future. Then one morning, on my way to work, my phone rang. It was my manager: “Congratulations, man! It got approved! I know how much work you’ve put into this, and I’m really happy it finally went your way.”
I let out a huge sigh of relief. Finally, I could stop imagining what the project could be and start actually building it. 400 000 NOK was secured. Now, we were ready to begin.
Making a musical room in the back of a van
Now I had both a position and project funding. But I hadn’t even dared to think about how I would actually carry it all out. I’d been so focused on writing applications and imagining what the project could be that I hadn’t spent much time planning what to do if I actually got the money. The contract was signed between me, the applicant organization Mental Helse, and Damstiftelsen. The project period would last two years, with 400,000 NOK granted to bring it to life. It took a while for it to really sink in: I had the green light to begin.
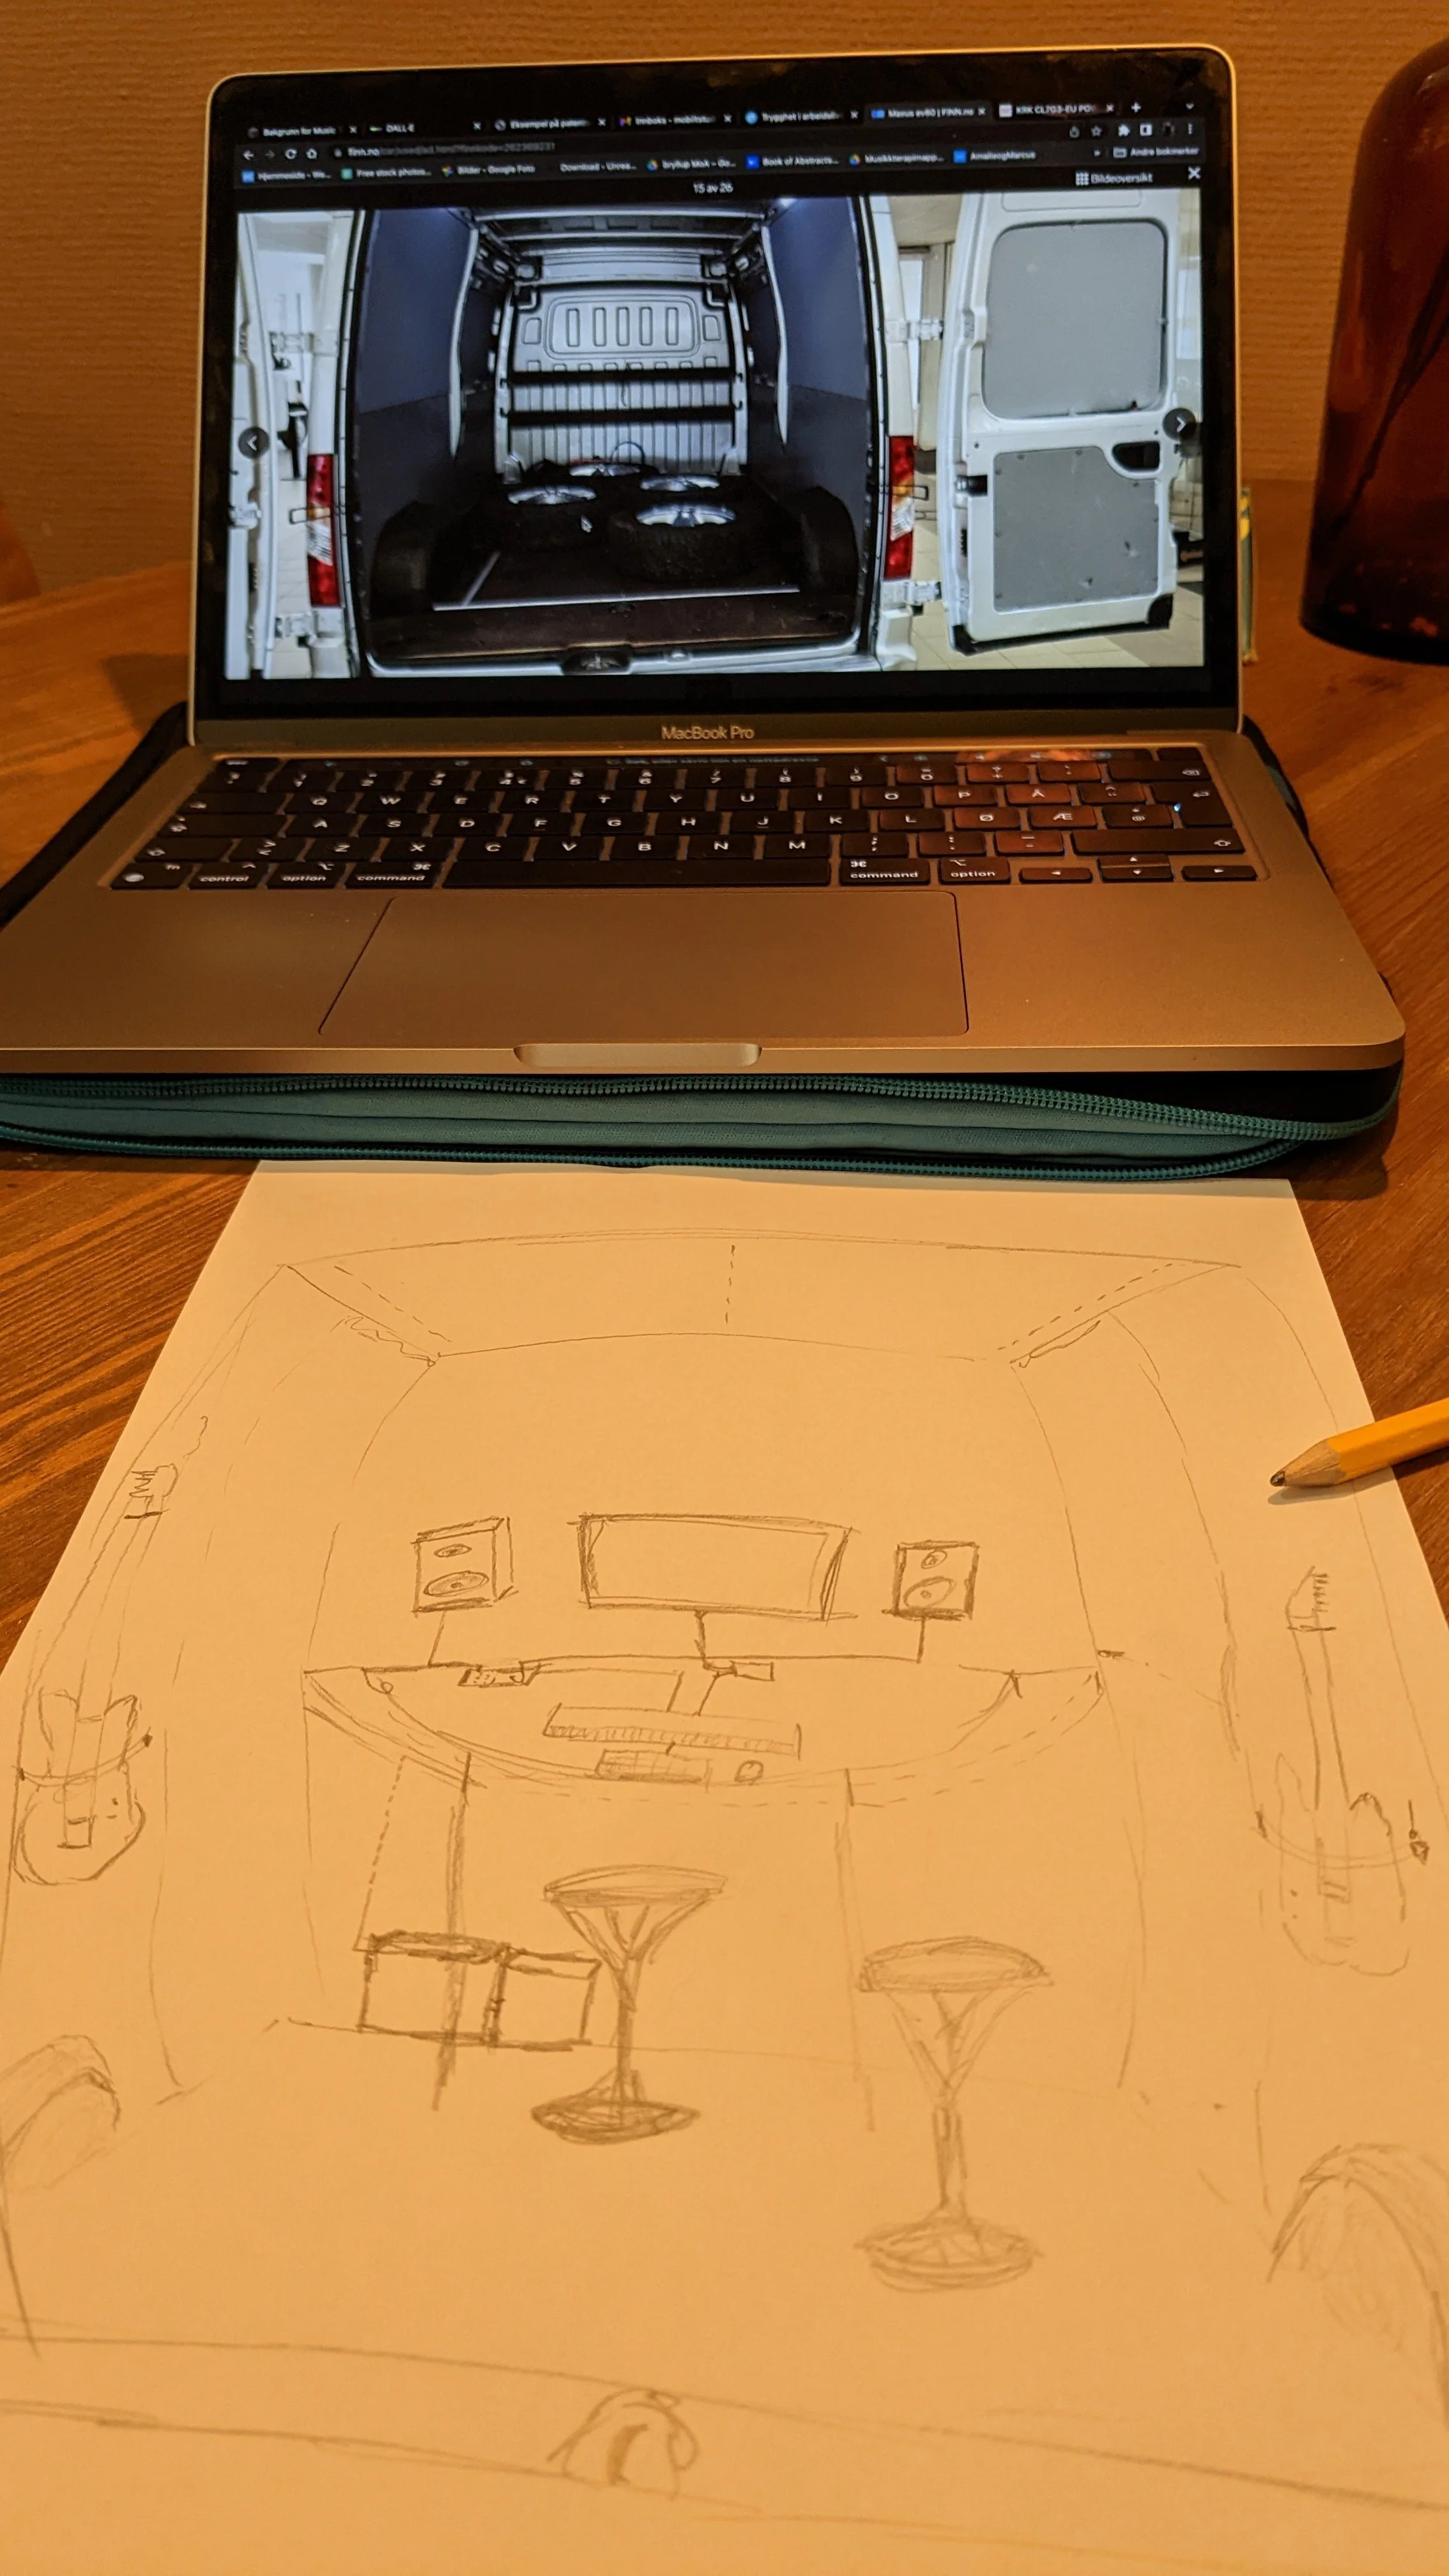
I was filled with optimism and drive. I picked up my notebook and started sketching ideas. What should the space look like? What should be in it? I had full creative freedom to design the room however I wanted. But I hadn’t thought much about that until now. What is a music room? A music therapy room? What makes it musical? What do I need in it? How do I want to practice music therapy—and for whom?
During the music therapy education, we spent a lot of time reading about existing practices—imitating, learning, and trying to figure out how we could fit into what already exist. But now I was out in the real world, and I had to decide how I wanted to do it. I’d never read about anyone doing something quite like this. Most of the research and examples I’d seen were based in centralized institutions or community centres. But I was building something different: a music room with a unique feature—it could move. A mobile studio/room. A service that could travel to where it was needed, instead of expecting people to come to it.
Outreach services like ACT and FACT teams had already been doing this in mental health care. But what made my project unique was that the vehicle itself was the destination. It wasn’t just a way to get from A to B—it was the service. It was the attraction.
So… what should the room look like? I could keep it simple and leave it as-is—a room with walls, a ceiling, and a floor. But I wanted it to feel musical… but what makes a room musical? I figured at least it needs the potential to partake in music in some way. A blank room doesn’t feel like a music room. But hang a guitar on the wall, and suddenly there’s musical potential. It becomes something more.
As I started sketching, more questions came up: What kind of vehicle should I buy; what instruments should I include; how will I power the studio; how can I soundproof it; what about ventilation, air quality, and temperature?
These were all things I had to figure out—one step at a time.
It quickly became clear that I needed a vehicle with a certain size. I wanted as much space as possible in the cargo area—ideally something I could almost stand upright in, and I wanted it to electric.
But then my department head told me it wasn’t that simple. I couldn’t buy the vehicle as a private person and use it for municipal work, and the municipality couldn’t buy from private sellers due to framework agreements (rammeavtale). It turned out this was the first time the municipality had ever dealt with a situation like this, there were no procedures for handling external funds or making purchases tied to them.
This was one of my first real encounters with interdepartmental communication in the municipality, and it was a mouthful. The department responsible for all vehicle purchases was the transport division. First, we had to submit a request outlining what kind of vehicle we needed and what modifications we planned to make. At first, it was unclear whether we’d have to pay for the vehicle in addition to covering operating costs and insurance. We argued that it wouldn’t be fair for the entire grant to go toward a vehicle the municipality already owned. Normally, when a vehicle is no longer in use, it’s returned to the transport division. But in this case, I was going to make major modifications to the interior, so the van wouldn’t be returned in its original condition. We made that very clear—and thankfully, it was approved. They weren’t planning to buy more of that model anyway. After a lot of back and forth, we found a solution: since the municipality already owned the vehicle, we would only pay for operating costs and insurance. That significantly reduced the cost. The downside was that I could only choose from vehicles the transport division already had. Buying a new one would have added extra costs. So, we had to hope they had something suitable.
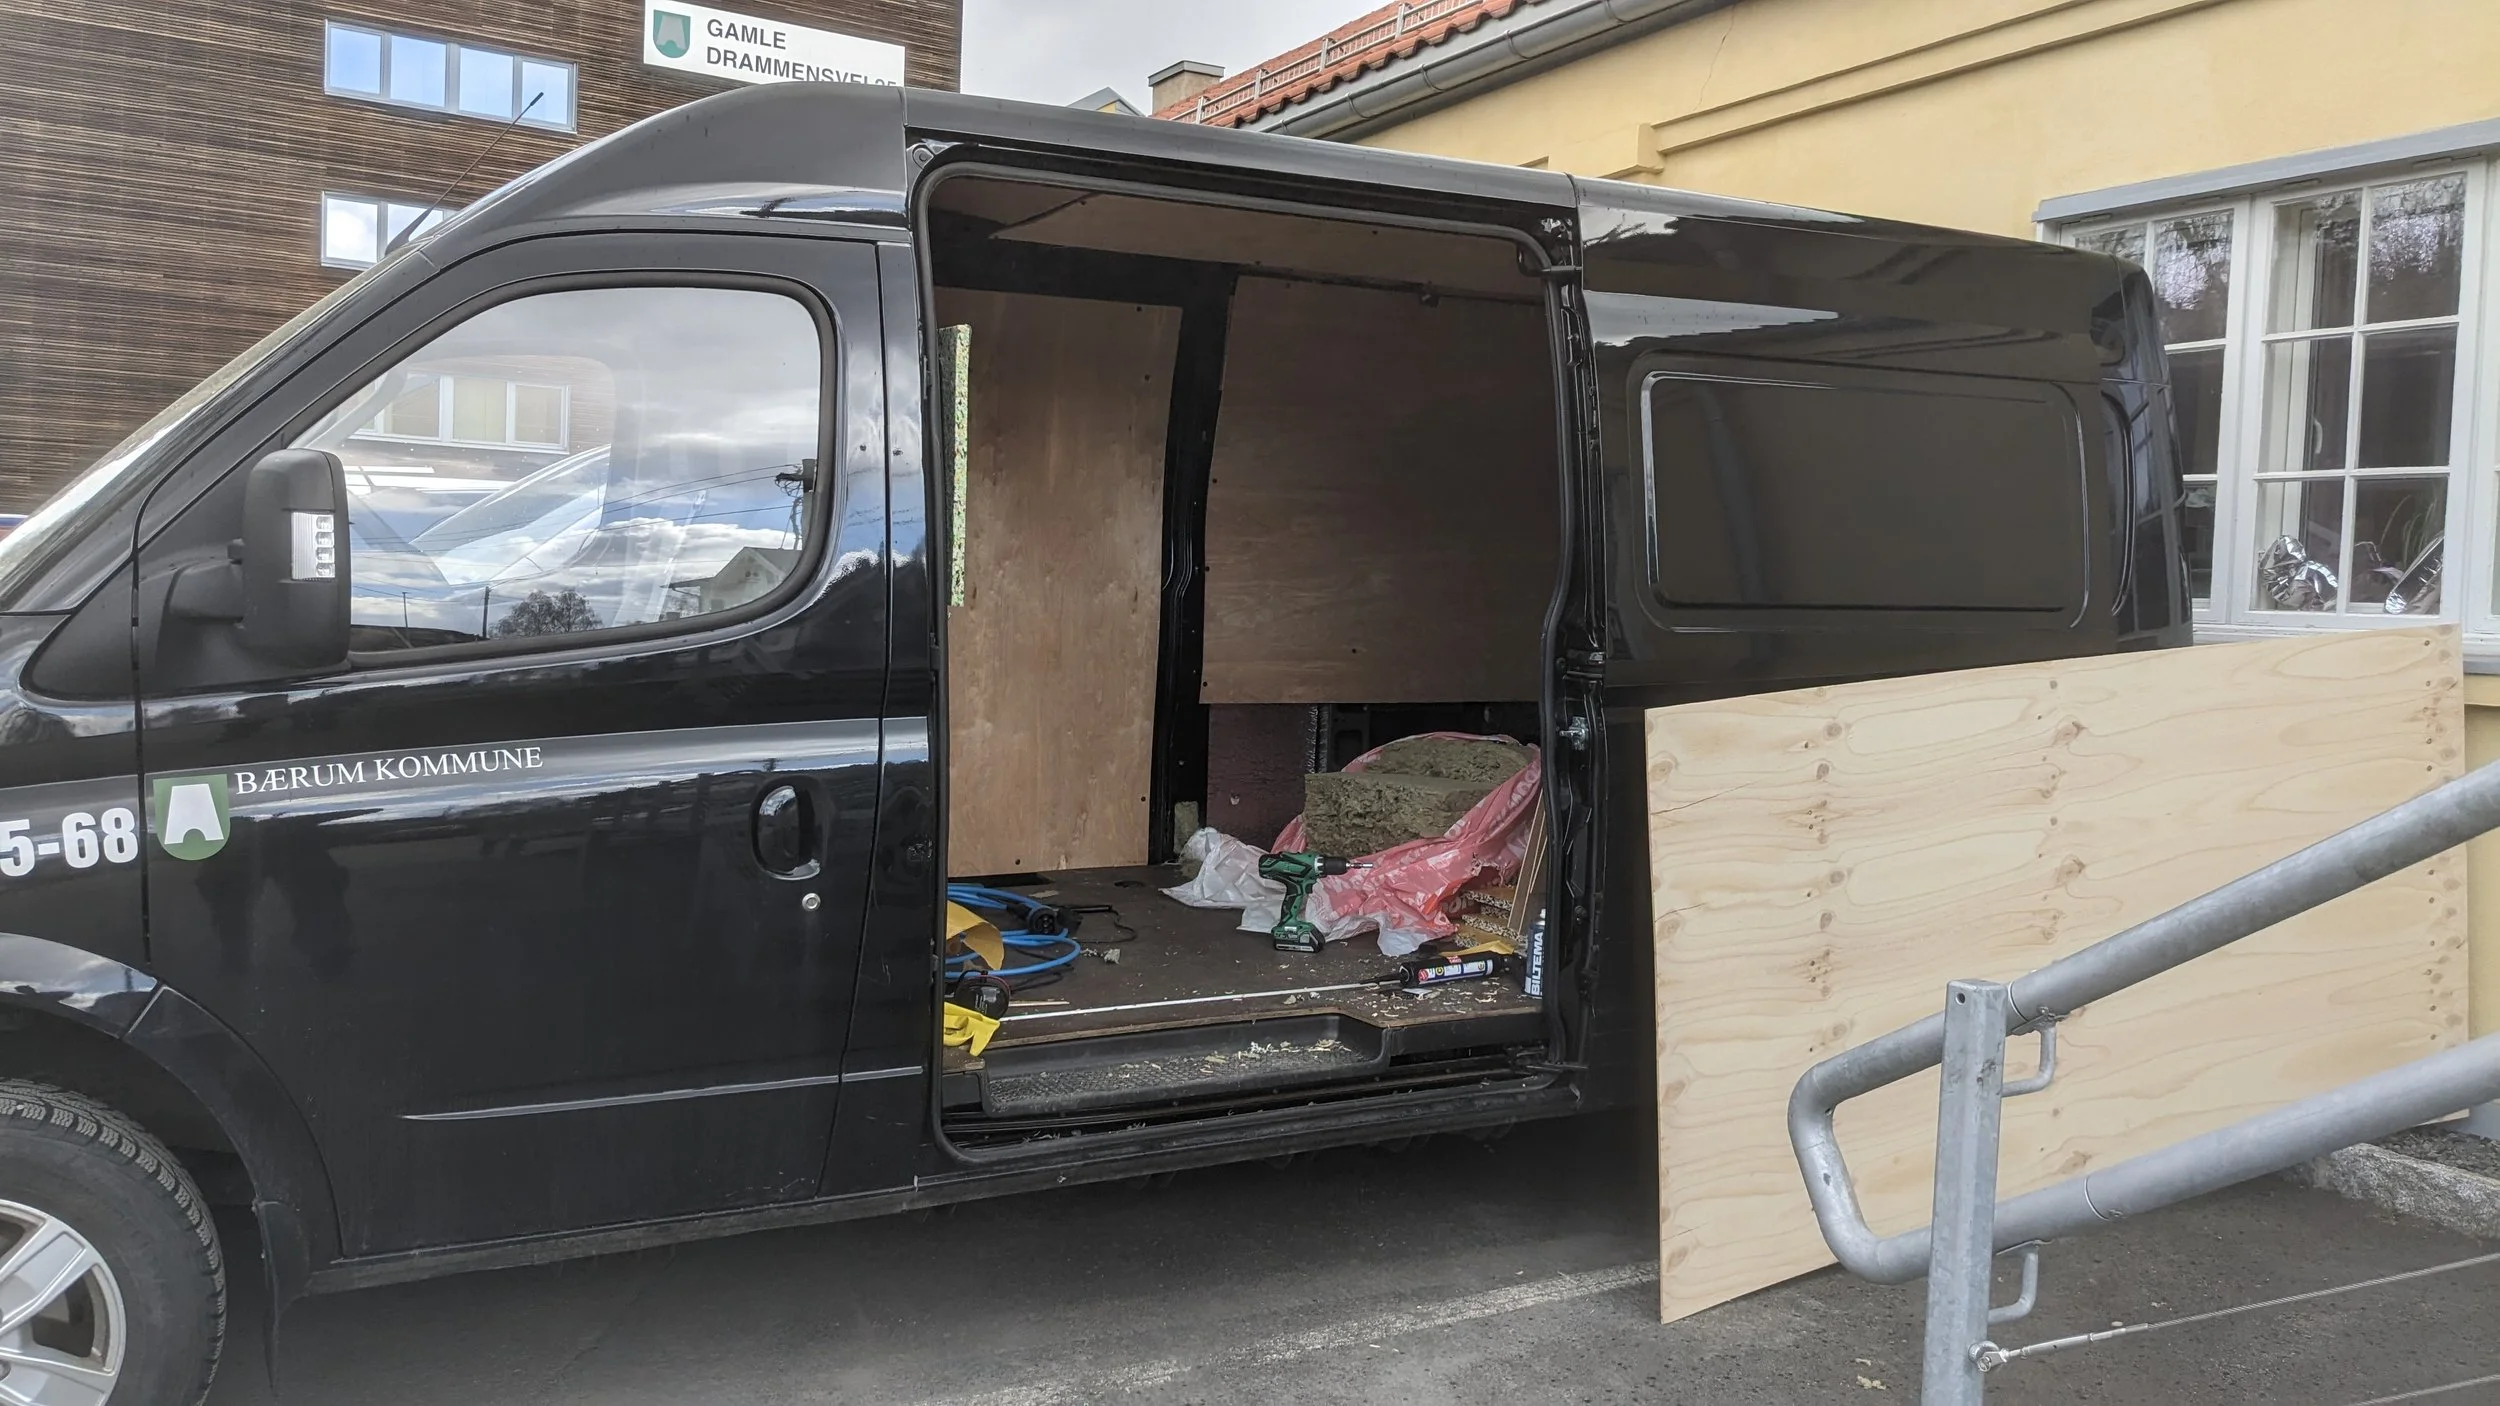
Luckily, they did. A Maxus EV80 that had previously been used to transport firewood. It was the perfect size. It was now February 2023. The vehicle was found, and the build could finally begin.
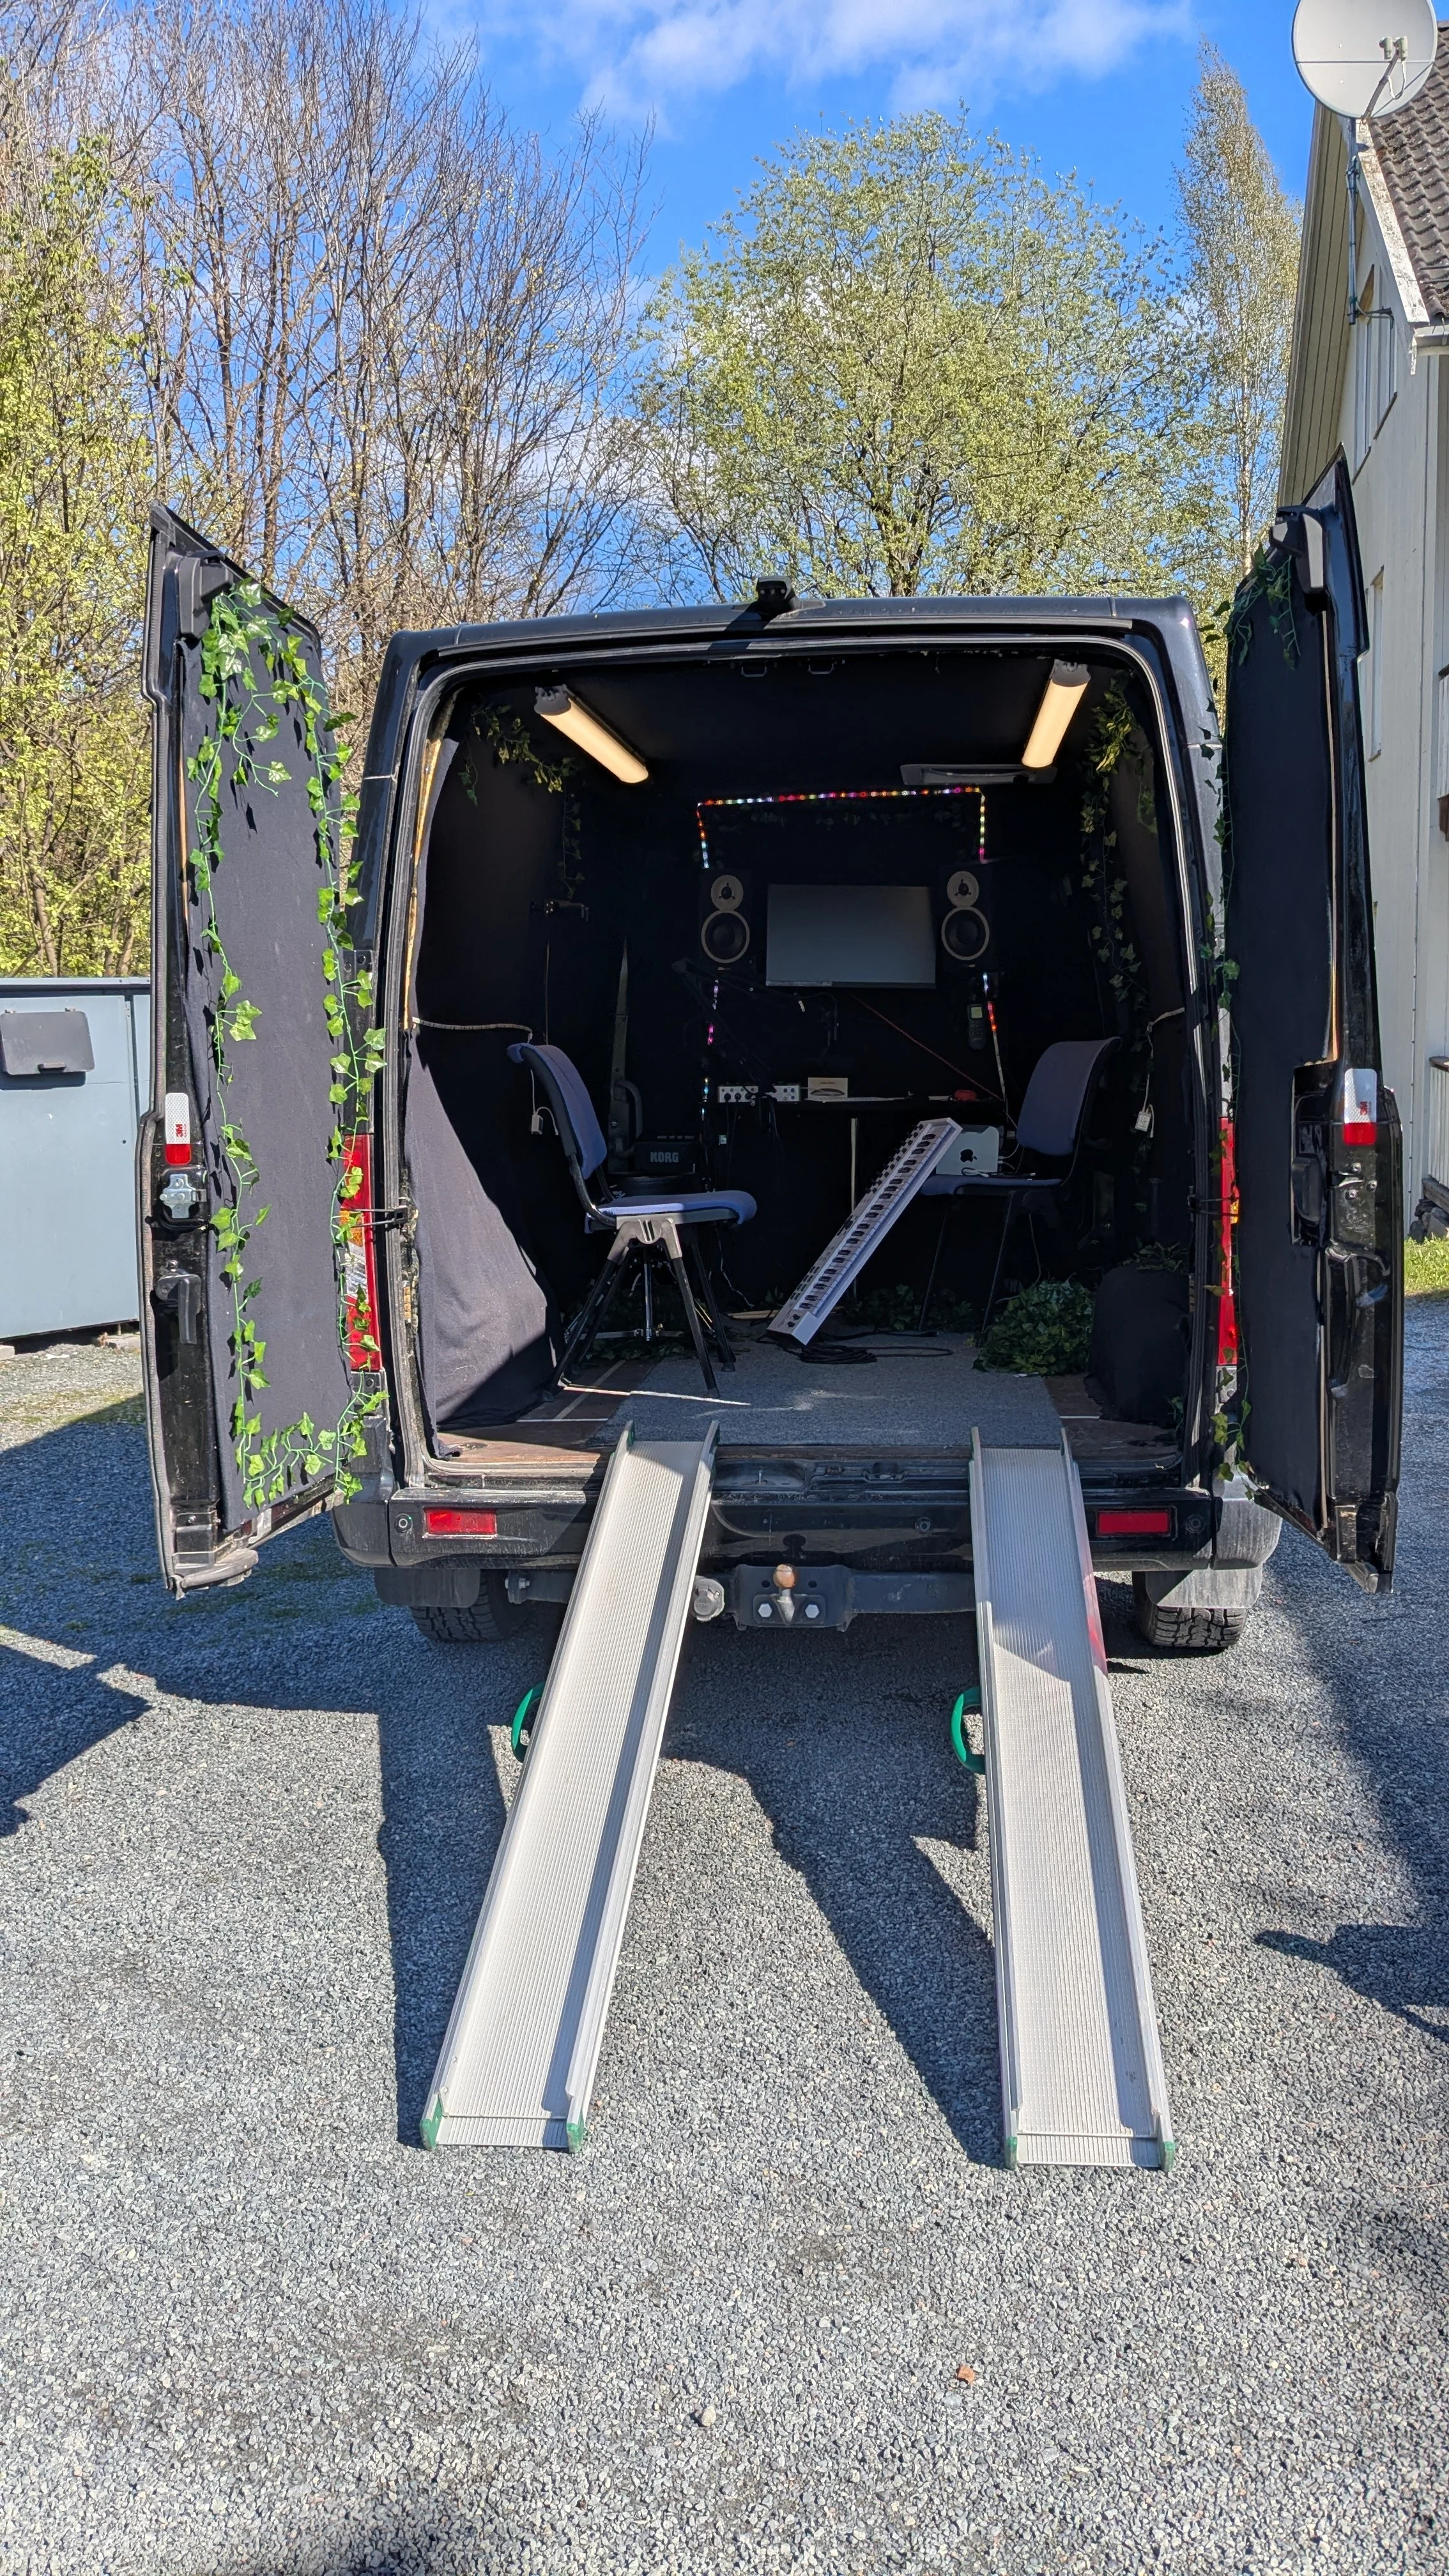
With the vehicle secured, it was time to start building. The decisions I made during the design and construction of the music van were largely driven by pragmatism. I had the time, I had the funding, and I had a strong desire to prove that the investment in me, and in this idea, was worth it. I wanted to get on the road and show that the project was viable. This van would essentially serve as a prototype, a first attempt at something that could be done in many different ways. Future mobile music therapy vans might be built smarter, more efficiently, or with different priorities. The van boasted an 11m³ cargo space, which could be outfitted in countless ways. This project would illustrate just one of them. The way I chose to furnish and shape the space reveals a lot about my own associations with what a music room or studio should be.
When I stood inside the cargo area, I saw a basic shell: a ceiling, walls, and a floor. The ceiling was made of thin metal, the walls were lined with hard plastic panels, probably to protect the metal, and the floor was plywood or something similar. This model didn’t have windows, though I knew others did. Technically, the space could function as-is. But I wanted it to be visually inviting and tailored to the kind of music-making I envisioned, both for myself and for the people I’d be working with.
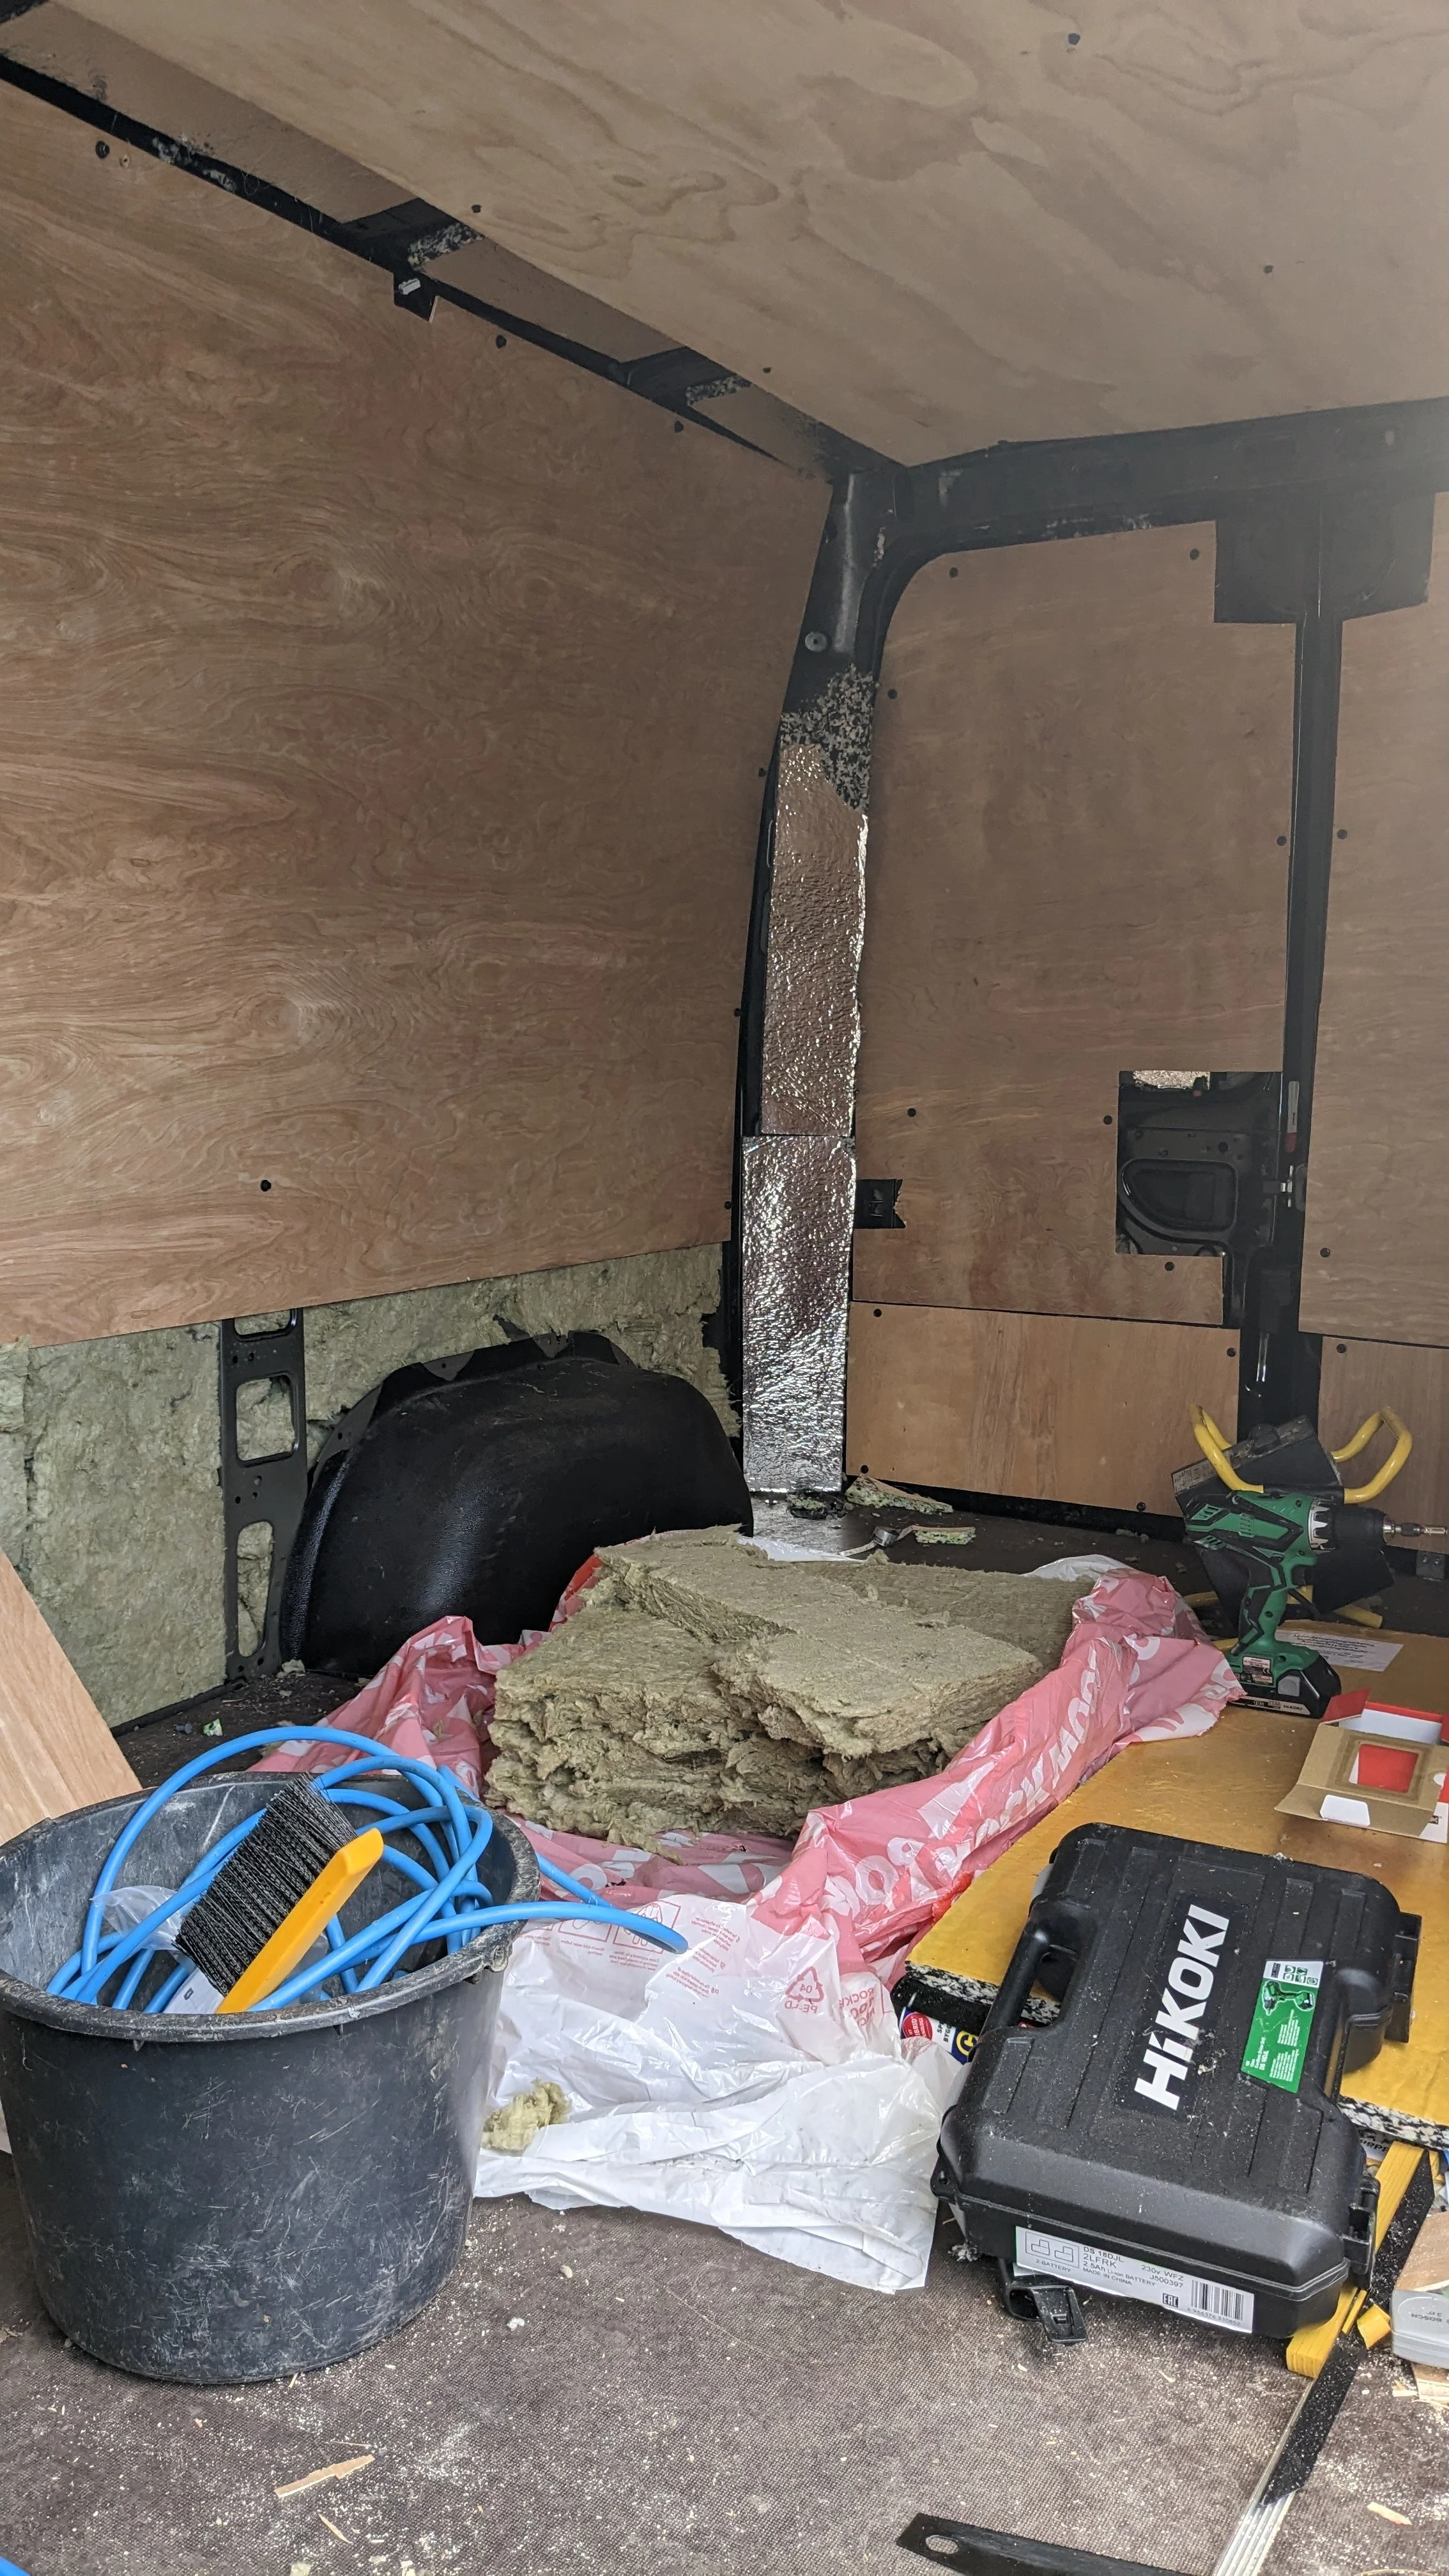
The first step was removing all the hard plastic wall panels. Since this would be a sound-producing space, I had to think about resonance—and metal is a big no-no. It resonates a lot. I needed to dampen that somehow.
I’d lived with a sound technician before and taken courses in studio acoustics, so I had some knowledge of room treatment. To prevent sound from bouncing between the plastic and the metal, I removed the plastic and glued 3 cm thick acoustic foam panels directly onto the metal frame. It was a process to get them all in place, but wow, what a difference. The room became acoustically “dead,” in a good way. It’s a small space, so you’ll never eliminate all reflections, but this made a huge improvement.
With the acoustics handled, the next step was temperature insulation. A van is exposed to the elements in a different way than a building. Thin metal walls leak heat much more than concrete or brick. I bought a roll of Rockwool insulation and cut it to fit the walls. But I couldn’t glue it, and it wouldn’t stay in place on its own. To hold the Rockwool in place, I bought plywood panels for the ceiling, two side walls, both sliding doors, and both rear doors. These panels not only secured the insulation but also served as the new interior walls of the music room. I screwed them directly into the van’s frame using metal-penetrating screws.
It was a lot of trial and error to find where the panels would hold best. I learned that the van’s frame provided the best support. The outer metal walls were too thin—screws would just punch through and stick out the other side. But the frame had thicker metal and hollow sections where screws could sit securely without piercing the exterior.
Now that the plywood walls were in place, the next step was figuring out how to furnish the space. I’ve always been interested in music technology and working in a DAW, so I knew early on that I wanted a studio setup inside the van.
Studio wall
On December 8, 2022, I sketched my first layout idea at the kitchen table. The drawing showed a studio wall facing the driving direction, right behind the driver’s seat. It included a screen, speakers, a studio desk, keyboard, mouse, guitars hanging on the wall, and batteries for power stored under the desk. I also considered placing the studio wall along the side of the van, but I wanted to make the most of the space while keeping emergency exits accessible. The van has three entry points: two sliding doors (one on each side) and a rear double door. I figured I’d use the rear doors most often, so I wanted to place the studio wall in a way that wouldn’t block access.
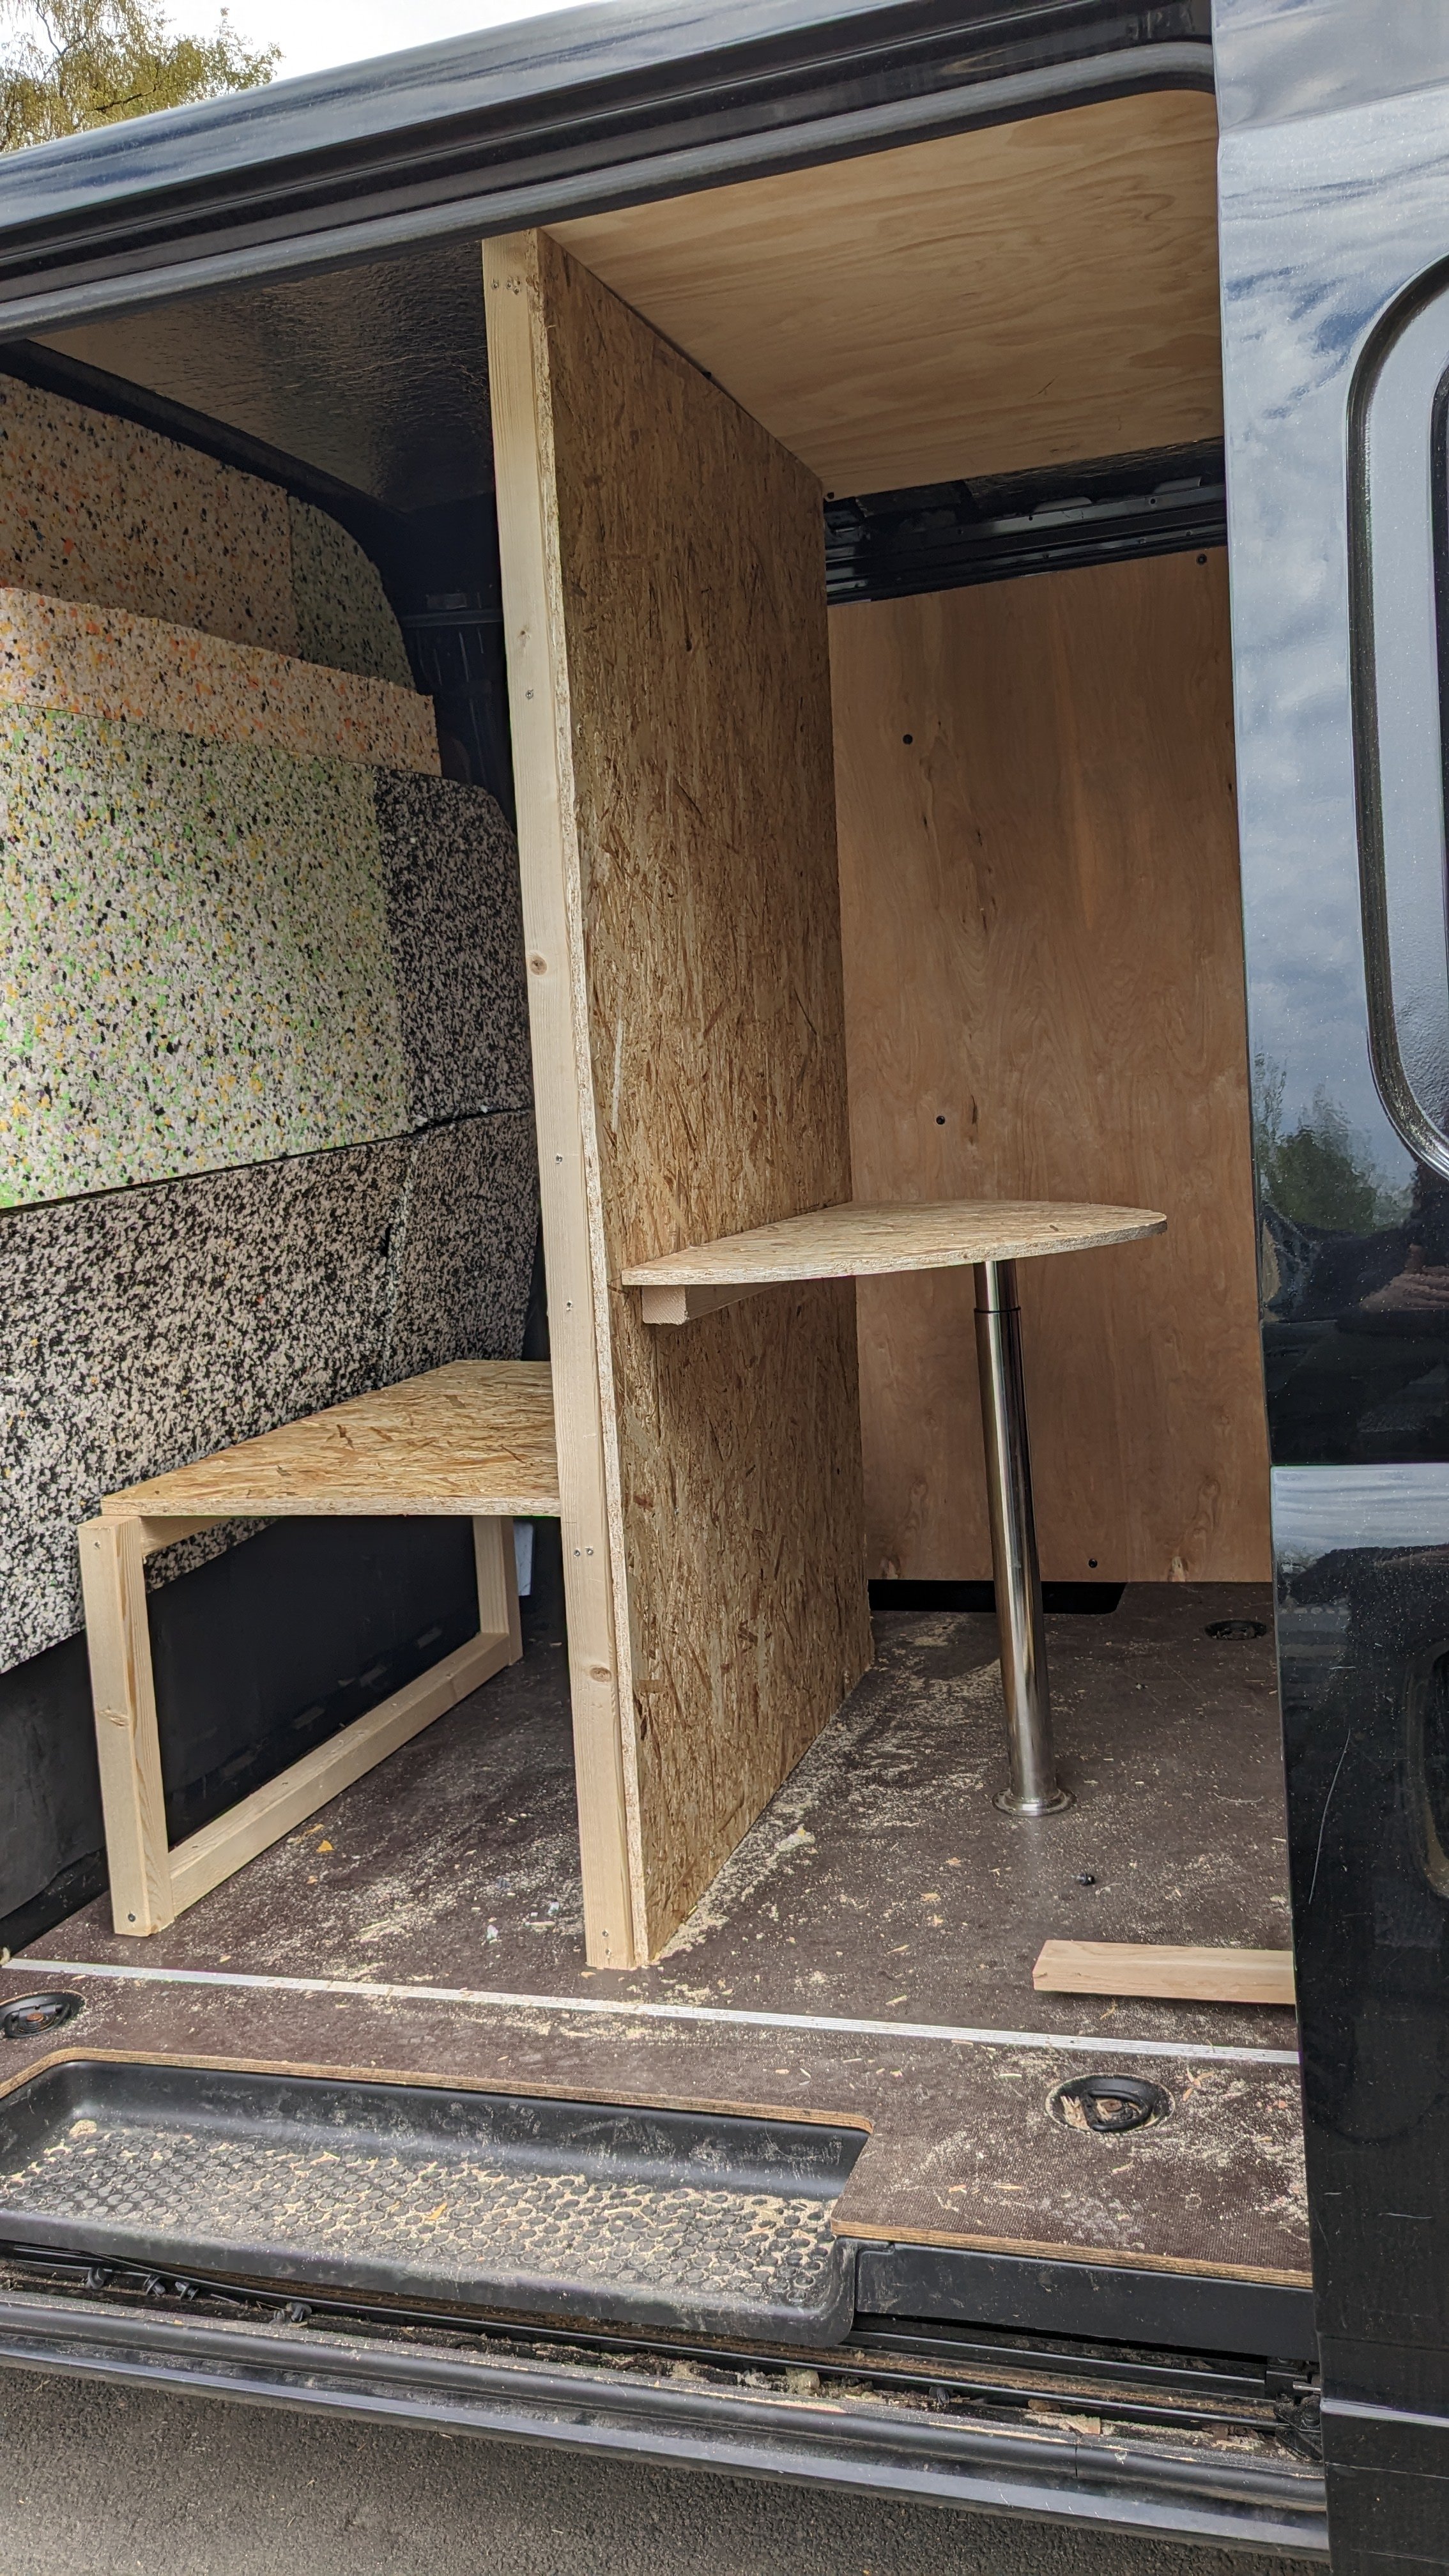
I ended up choosing to place the studio wall behind the driver’s seat. To add storage, I built a freestanding wall a bit away from the cab wall, creating a hidden but easily accessible storage space. I wanted the studio to feel comfortable and practical, with everything within reach. The wall had to go from floor to ceiling but not be so wide that it blocked the side doors. One unique challenge with building a studio in a vehicle is that everything must be secured for transport. The wall had to be solid, and all loose items needed to be strapped down or stored safely. Cables had to be organized and placed strategically for power access. Space was limited, so every decision had to be smart and efficient. I started by screwing studs into the floor and ceiling using metal-penetrating screws. Then I added vertical studs from floor to ceiling, with horizontal supports every 50 cm to stabilize the wall.
On the studio side, I mounted an OSB/hobby board to attach the studio gear—monitor, speakers, desk, etc. On the driver’s side, I added sound insulation panels to reduce echo between the cab and the studio wall. I built the studio desk directly onto the OSB board using a spare table leg. I noticed that a square desk made it hard to exit through the side doors, so I rounded the corners and shaped it into a half-circle. Inside the storage space, I built a simple shelving system using studs and OSB, which also helped stabilize the wall. At this point, the rough construction was done. Every surface was insulated and covered with wood. The music room was built. Technically, it was ready. I mounted the PC monitor, speakers, and audio interface—and it worked. The screen lit up. In theory, I could start visiting people.
But something was missing.
The space was covered in sawdust. It smelled like wood. I was surrounded by plywood. It was fine, in a way—but it didn’t feel like a studio. It felt more like a fancy firewood transport van. I went back to the drawing board and started searching online for inspiration. I found images of studios with acoustic panels, curtains, plants, rugs, uneven surfaces, and instruments. The interior design really shaped the atmosphere.
I realized I wanted a calm, focused vibe—something that felt like being backstage at a theater, cinema or rock venue, with dark stage curtains that didn’t draw attention but helped you focus on what mattered. So I bought fire-retardant molton fabric (stage curtains) and stapled it to the plywood walls. The studio wall was now fully built and equipped with speakers, monitor, keyboard, mouse, audio interface, and a Mac Mini. Inspired by the studio photos, I also added a rug with anti-slip backing I had at home and stapled up some LED lights around the studio wall to brighten the space—it had been a bit too dark.
Fasten your seatbelts
While everything that was screwed into the wall stayed secure during transport, the items on the desk were a different story. I needed a way to keep them from flying around while driving. I bought a case for the Mac Mini and mounted it directly under the studio desk. The keyboard and mouse go into their own case between each visit and are placed on the floor. The audio interface sits securely on the desk and doesn’t need to be fastened. Even though the room was functional, I felt it was too dark. I’d seen pictures of studios with a bit of colour, often using plants to soften the space. I didn’t have the heart to put real plants in a van that never sees daylight, so I used artificial ivy leftover from my wedding and draped it around the space.
The atmosphere changed completely. The stage curtains absorbed sound, reduced distractions, and helped focus attention on the screen and the music. One thing I hadn’t considered was cable management. Once everything was connected, it was a mess of wires. To tidy it up, I had to remove parts of the molton fabric, hide the cables behind it, and then re-staple the fabric. It made a huge difference—visually and practically. The studio looked much cleaner and more professional.
Musical instruments
The next big question was: What kind of musical equipment do I actually need? More importantly—what do the people I visit want to use the van for? I had some ideas based on my own experience and preferences, but I wanted some input. So, I invited a couple of participants to join me on a trip to a music store. It was like being in a candy shop—so many possibilities, and the excitement was contagious.
Together, we picked out instruments they were genuinely interested in using. We ended up equipping the van with a solid set of traditional instruments: Guitar, bass, electronic drum pad, keyboard, a microphone. In addition to the physical instruments, we also invested in a range of synth plugins for the DAW (Digital Audio Workstation), expanding the creative possibilities even further.
Universal access
While the van is mobile and flexible, true accessibility means adapting the service to the user—not the other way around. There is a 40–50 cm step into the van, and this can be a significant barrier for wheelchair users. It would be deeply ironic if a mobile service designed to promote inclusion ended up excluding those with limited physical mobility. To address this, the van is equipped with a ramp, ensuring that everyone can participate equally.
Power supply
Now that the studio was built, I needed a power supply. I wanted to be independent of the electricity at the locations I visited. Ideally, I’d have a battery powerful enough to run the studio on its own. A generator was another option, but it would be noisy, and I wanted to avoid fossil fuels, especially since the van itself is electric.
After a lot of research, I discovered EcoFlow, a company that sells portable battery packs with capacities up to 2000Wh. You could even chain multiple batteries together and connect solar panels for charging. That was a game-changer—on sunny days, I could be completely self-sufficient. The challenge was where to place the solar panel. The van’s roof was too uneven and dented for a clean install, and I didn’t have the skills or tools to build a roof rack. So I decided to skip the solar panel for now and focus on getting the van operational. The battery could be charged indoors by plugging it into a wall socket, which was simple and effective.
But then—disaster struck.
One day, while working in the van, I brought the battery out to test the lighting and studio setup. I went inside for lunch, and when I came back… the battery was gone. I was sure I had locked the door. But in just 20–30 minutes, a 45,000 NOK battery had vanished. My heart sank. I had to buy new ones.
Ventilation and Lighting
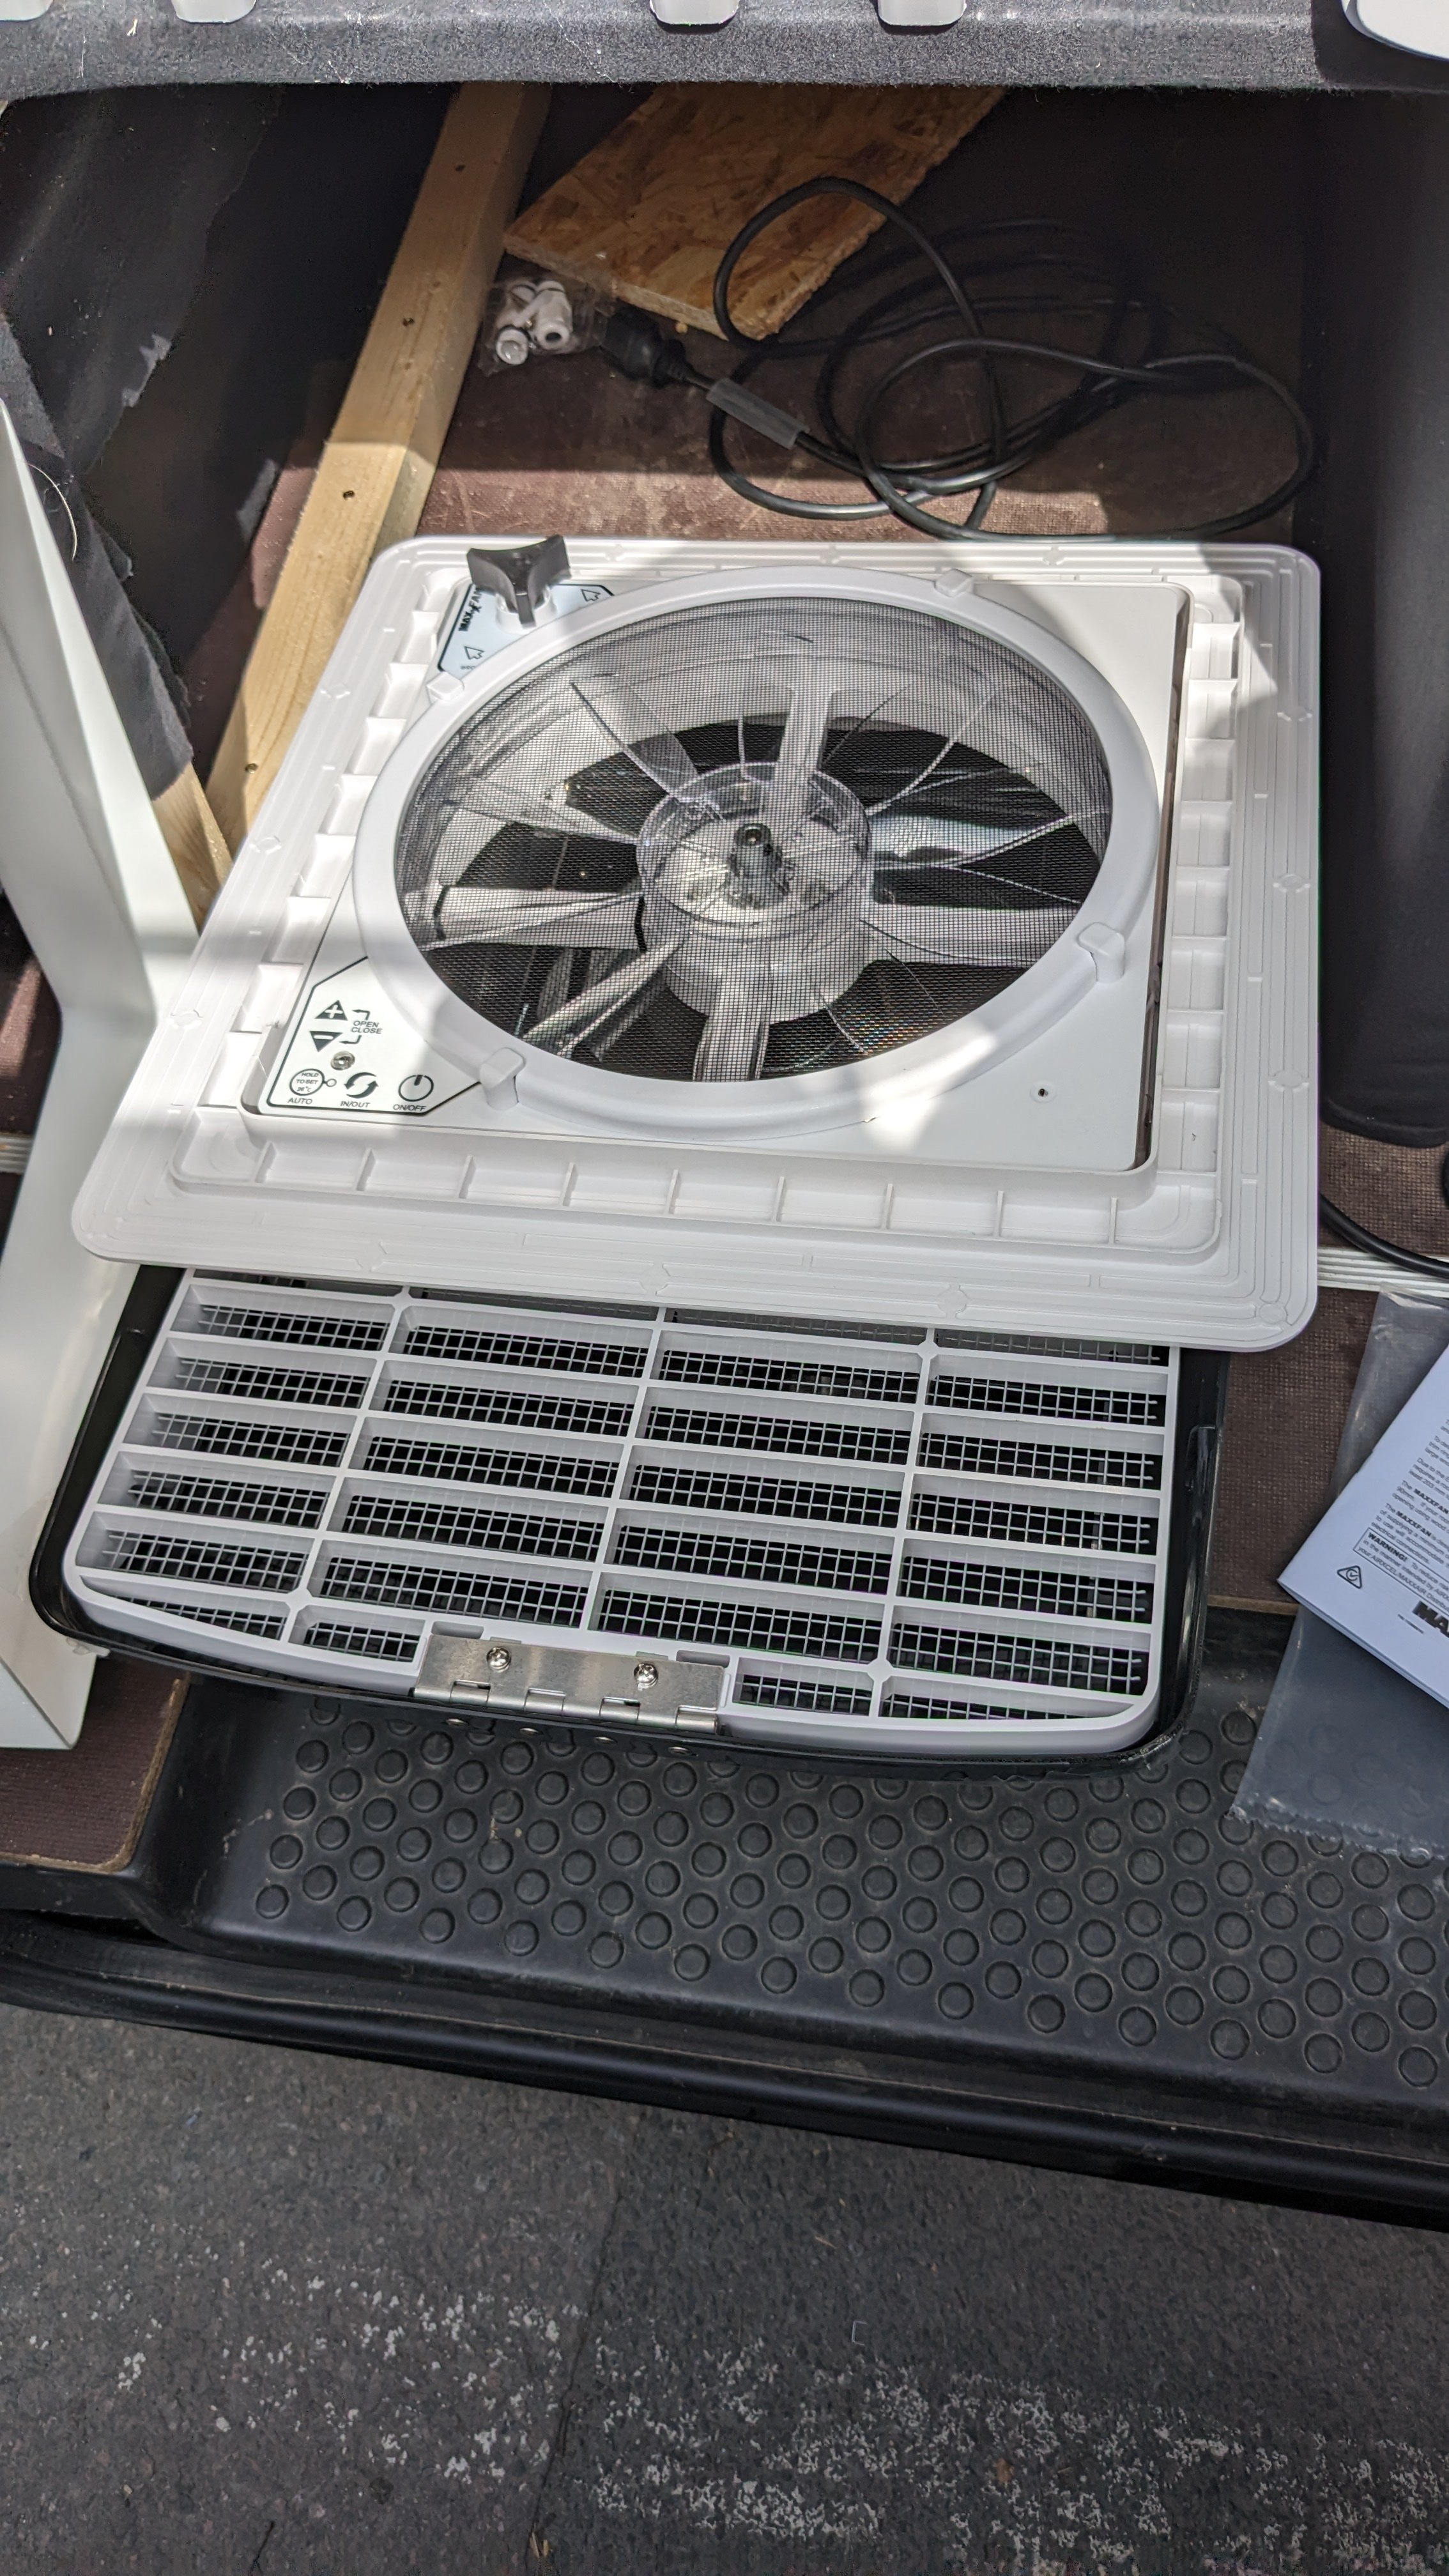
By June 2023, I was installing ceiling lights to make the van more usable. I’d already visited a few familiar patients, using temporary lamps—but it was clear I needed better lighting. The summer heat made the van hot and stuffy, and the air quality was poor—likely due to the excellent insulation. I realized I needed ventilation. Inspired by my in-laws’ camper van, I started looking into roof fans. I contacted 10–15 workshops in the city, but none would install a roof fan. Some didn’t work with my van model, others couldn’t guarantee a watertight seal, which would void warranties and insurance.
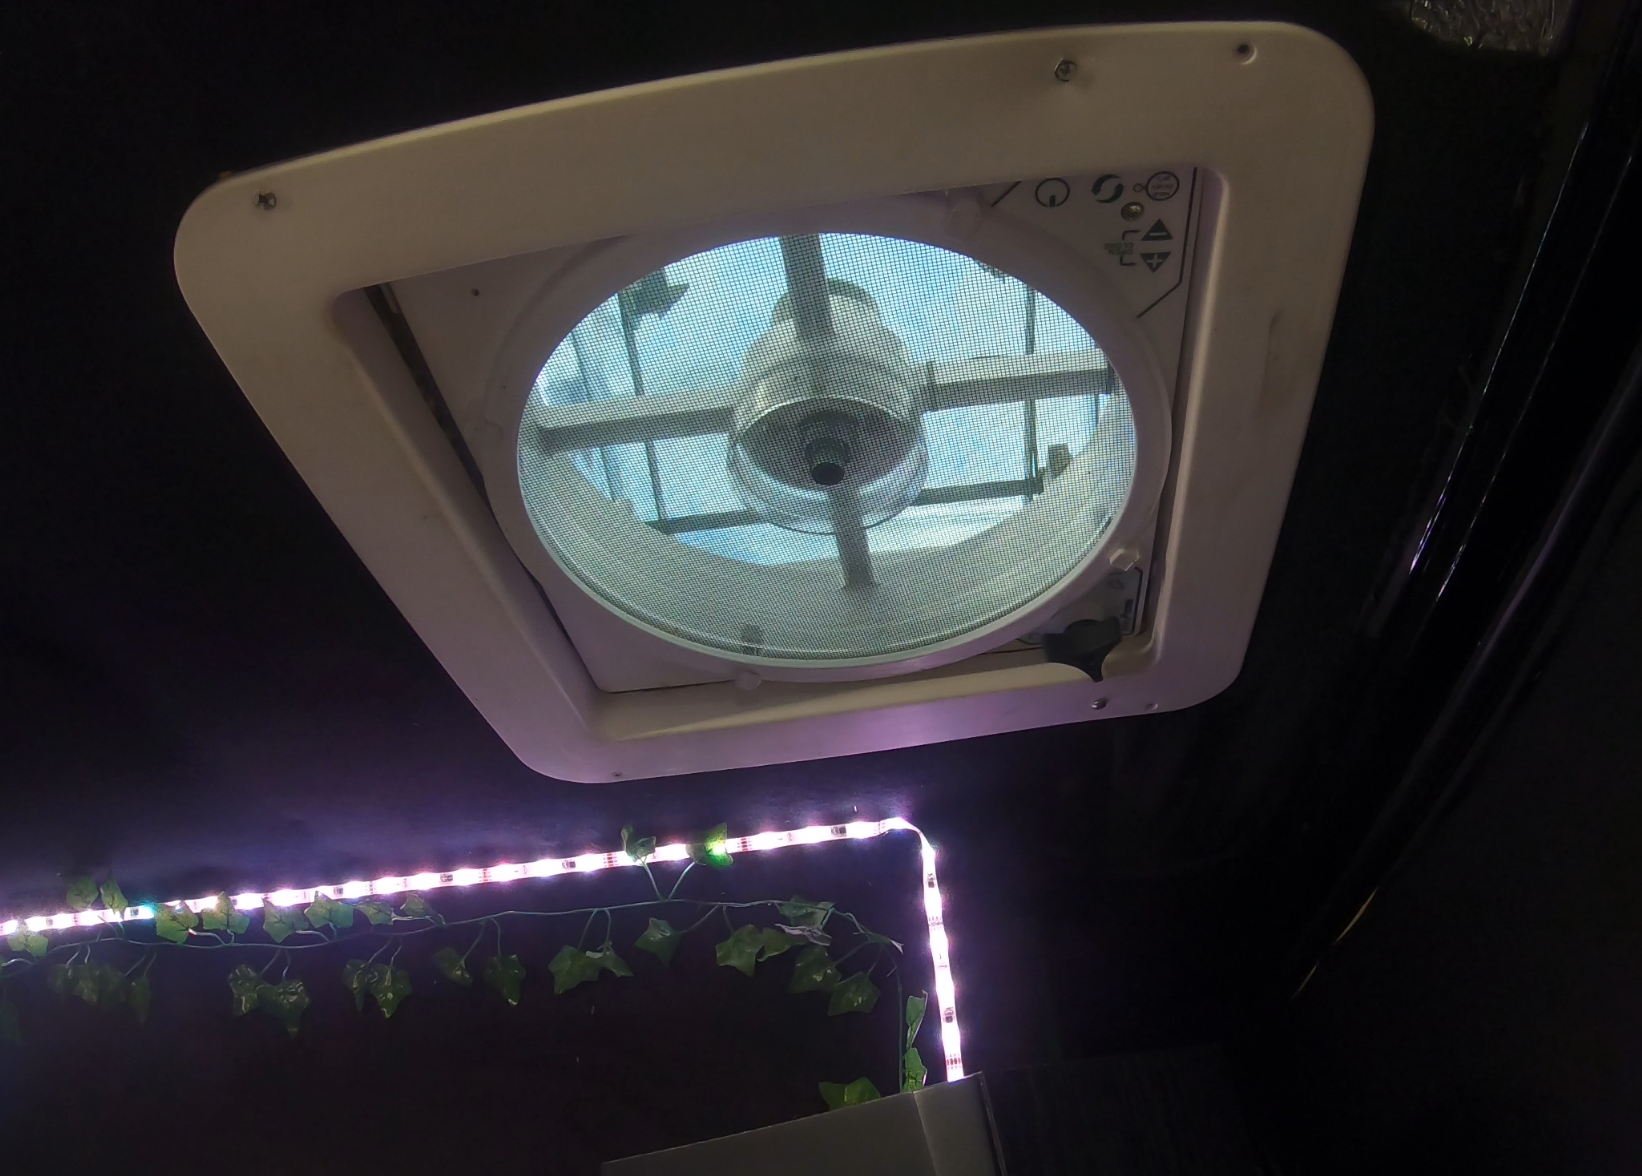
Eventually, a workshop outside of town agreed to do it. I brought the fan and drove out. We discussed placement, and they recommended installing it toward the front, with a potential rear vent later. Due to the studio wall and screen placement, the best spot was front-right. I left the van and took the train home. A few days later, the van was ready. My department head picked it up for me. When I returned, I was thrilled—the fan looked great and instantly improved the air quality. It even came with a remote control to open/close it and reverse airflow. Then I realized something: the fan needed power.
Wiring the Fan
The fan didn’t respond to the remote. I checked the wiring and found a black and white cable. The manual said it required 12V. I looked through the battery accessories and found a 12V adapter. The battery had four 230V outlets, several USB ports, and—yes—a 12V input.
Thanks to my hobby experience with soldering guitar pickups and building FPV drones, I carefully identified the positive and negative wires, soldered the connections, plugged it into the battery, and flipped the switch—ready to shut it off if anything sparked. The fan responded with a satisfying click. Success! Now I just needed to hide the cables neatly and place the outlets where I planned to store the battery.